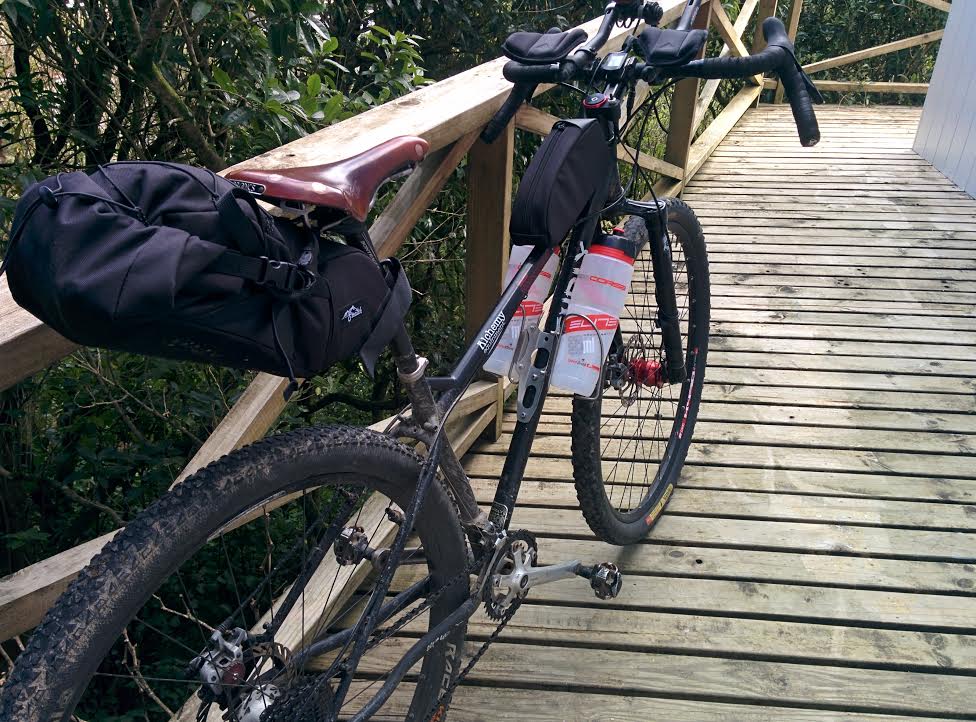
I've just realised that I've been posting most of my Tour Aotearoa stuff on my Instagram instead of my blog, which is pretty hopeless as far as being a resource for anyone else who may be interested.
See below a graphic timeline for creating my "charging regime" for the Tour Aotearoa Brevet.
I started with an Exposure dynamo Light, I saw a great deal on Evans cycles and picked it up for around $350 NZ plus $20 shipping. A light AND the Exposure branded SP hub. That is very cheap. It was an impulse buy. It is a 9mm QR hub with 28 holes, possibly why it was cheap, with through-axle being more in demand these days for some people, and 28 holes being more suited to a road application than off-road.

I got a new rim and spokes and Francis at Jville Cycles built up the wheel.

It was great. I had free light for as long as I could pedal! But this was just the beginning. Nathan Mawkes told me what he did for his Kiwi Brevet charging regime, and as it was a very cheap option I followed suit. Even cheaper than Nathans option. I brought a 10 US$ torch, and an 8 US$ charger/power-bank, with a couple of 18650 (Chinese) rechargeable batteries thrown in.

I ran some tests. This torch is very bright. It has high, medium, and low modes plus a few more. It lasts for 3.5, 7 and 14 hours respectively.
18650 batteries are what is found in lap-top cases. I almost started a fire breaking one up. If you do this, exercise caution.

These are unprotected cells. Don't put them on charge and go out for the day! The good ones are about $18.50 each NZ from MrPositive (if you cant gut an old lap-top without maiming yourself then buy the Panasonics).
You will need a way to charge these batteries, as your dynamo won't do it "out-of-the-box" . You need a USB-converter, the Sinewave one is good, but not cheap. I got Kerry at kLite to build me a switch as well so I could easily toggle from lights to USB charging.
 The plan goes like this:
1. Start with about 3 fully charged 18650 batteries.
2. Use one as a cache-battery inline between my dynamo and my "device" be it GPS or phone.
3. In the evening, I can also use one of the batteries as back-up in the spare torch which I can strap to my helmet.
The cheapie charger/power-bank allows "pass-through-charging" which you need if you are going to be charging and being charged at the same time.

The white thing inline here is just temporary. It is measuring the load from my GPS.

A rather crowded dash-board.

All of the gizmos will fit in here. A Stealth Bike Bags top-tube bag.
So far my testing has been pretty minimal. But I can say this.
It all fits.
I rode around the bays the other day and charged my phone from 5% to 72% in about 1.5 hours.
Isn't all this TECHNOLOGY risky?
Of course.
The fall-back plan
I will take a spare USB cable for my phone.
This is also spare for charging my power-bank device.
I will take a 3 pin USB plug and a tiny 3 port hub to plug into it, should my dynamo explode leaving me with no electricity, forcing me to charge in a motel or such-like.
I will take my original dynamo light harness as a spare in case my switch/harness gets damaged.
Basically if I have a "power-transmission" outage I will be USB charging my batteries, phones and light from 3 pin plugs. 3 x 3.5, 7 and 14 hours is a lot of light. This is what most people will be doing anyway, it's just my back-up.
That's the theory anyway : )
Bright but cheap torch
http://www.lights-box.com/ultrafire-wf-501b-cree-xm-l-t6-1000-lumens-5-modes-led-torch-1-x-18650-battery
Basic power-bank/charger
https://www.fasttech.com/product/1137904
Tester gizmo
http://www.dx.com/p/lcd-display-usb-power-charger-data-transmit-current-voltage-tester-capacity-tester-white-315314#.Ved5f5cUe80
PS. Don't burn down your house messing around with this stuff.
If I told you to jump off a cliff would you?
Exactly.


See below a graphic timeline for creating my "charging regime" for the Tour Aotearoa Brevet.
I started with an Exposure dynamo Light, I saw a great deal on Evans cycles and picked it up for around $350 NZ plus $20 shipping. A light AND the Exposure branded SP hub. That is very cheap. It was an impulse buy. It is a 9mm QR hub with 28 holes, possibly why it was cheap, with through-axle being more in demand these days for some people, and 28 holes being more suited to a road application than off-road.

I got a new rim and spokes and Francis at Jville Cycles built up the wheel.

It was great. I had free light for as long as I could pedal! But this was just the beginning. Nathan Mawkes told me what he did for his Kiwi Brevet charging regime, and as it was a very cheap option I followed suit. Even cheaper than Nathans option. I brought a 10 US$ torch, and an 8 US$ charger/power-bank, with a couple of 18650 (Chinese) rechargeable batteries thrown in.

I ran some tests. This torch is very bright. It has high, medium, and low modes plus a few more. It lasts for 3.5, 7 and 14 hours respectively.
18650 batteries are what is found in lap-top cases. I almost started a fire breaking one up. If you do this, exercise caution.

These are unprotected cells. Don't put them on charge and go out for the day! The good ones are about $18.50 each NZ from MrPositive (if you cant gut an old lap-top without maiming yourself then buy the Panasonics).
You will need a way to charge these batteries, as your dynamo won't do it "out-of-the-box" . You need a USB-converter, the Sinewave one is good, but not cheap. I got Kerry at kLite to build me a switch as well so I could easily toggle from lights to USB charging.
 The plan goes like this:
1. Start with about 3 fully charged 18650 batteries.
2. Use one as a cache-battery inline between my dynamo and my "device" be it GPS or phone.
3. In the evening, I can also use one of the batteries as back-up in the spare torch which I can strap to my helmet.
The cheapie charger/power-bank allows "pass-through-charging" which you need if you are going to be charging and being charged at the same time.

The white thing inline here is just temporary. It is measuring the load from my GPS.

A rather crowded dash-board.

All of the gizmos will fit in here. A Stealth Bike Bags top-tube bag.
So far my testing has been pretty minimal. But I can say this.
It all fits.
I rode around the bays the other day and charged my phone from 5% to 72% in about 1.5 hours.
Isn't all this TECHNOLOGY risky?
Of course.
The fall-back plan
I will take a spare USB cable for my phone.
This is also spare for charging my power-bank device.
I will take a 3 pin USB plug and a tiny 3 port hub to plug into it, should my dynamo explode leaving me with no electricity, forcing me to charge in a motel or such-like.
I will take my original dynamo light harness as a spare in case my switch/harness gets damaged.
Basically if I have a "power-transmission" outage I will be USB charging my batteries, phones and light from 3 pin plugs. 3 x 3.5, 7 and 14 hours is a lot of light. This is what most people will be doing anyway, it's just my back-up.
That's the theory anyway : )
Bright but cheap torch
http://www.lights-box.com/ultrafire-wf-501b-cree-xm-l-t6-1000-lumens-5-modes-led-torch-1-x-18650-battery
Basic power-bank/charger
https://www.fasttech.com/product/1137904
Tester gizmo
http://www.dx.com/p/lcd-display-usb-power-charger-data-transmit-current-voltage-tester-capacity-tester-white-315314#.Ved5f5cUe80
PS. Don't burn down your house messing around with this stuff.
If I told you to jump off a cliff would you?
Exactly.